Individual hand-made stained and fused glass
Coasters | Bowls and Dishes | Cufflinks | Driftwood | wing | Precious Elements | Plaques | Sea Forms | Mirrors | Christmas | Commissions | Stands |
| About Hearts of Glass: | Methods | Lessons | Testimonials | History |
Methods - Copper Foiling and Leaded Light


|
||
Copper Foiling This technique is good for smaller, more intricate shapes. It involves cutting pieces of galss to form a pattern followed by wrapping the edges with thin strips of metallic foil. You assemble the pieces, probably using a right-angled board with "lips" on as a jig. You then apply flux to the seams and melt solder on to hold the work together. Both sides of the piece will need to be soldered and you will solder the external edges as well. Finally you will clean up the work and attach hooks or loops as necessary to display the finished piece. |
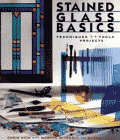
Another favourite book of ours is: Stained Glass Basics: Techniques, Tools, Projects
|
|
You will need:
|
|
|
| Also useful is to have a flat work board with a right angled L shaped edge to hold work up against. |
||
| Leaded Glass | ||
Similar to copper foiling, you will cut out your glass and use a jig to line up the pieces. Next you cut out lead came to fit around each piece of glass and start to assemble the work. When you are happy with the positioning of all the pieces you flux and solder every joint on both sides of the panel. The panel may need to be weather-proofed and/or strengthened and this is done by applying lead cement. The panel is cleaned and a finishing compund applied. |
||


